Posts

"ধূমপায়ীরা প্রকৃত দেশপ্রেমিক !" | Somoy Exclusive

Image

select2 is not working in AdminLTE

Image
It suffers me a lot. It takes a lot of time from me to research and solve the problem. The problem was very simple. I have faced the problem and solved it. Main problem was select2 doesn't get ajax.googleapis cdn. So, before the jQuery code I have loaded the cdn and it works fine now. Firstly, the code was     <script>         $(document).ready(function() {             $('.js-example-basic-multiple').select2();         });     </script> The problem is looked like the picture below Now after adding the cdn before the script tag. it has been solved the problem and the code looks like below     <script src="https://code.jquery.com/jquery-3.4.1.js" integrity="sha256-WpOohJOqMqqyKL9FccASB9O0KwACQJpFTUBLTYOVvVU=" crossorigin="anonymous"></script>       <script>         $(document).ready(function() {    ...

proc_open(): fork failed-can not allocate memory, error on aws ec2 instance while updating/installing some libraries or packages using composer

Image
Introduction:                     Firstly we have to understand why this error occurs? If we understand the problem then it  is very easy to solve the problem. While we create instances on a cloud platform, we notice lot of parameters to decrease the bill and as well as performance should remain fantastic. Actually if the instance produces no bill, it is tremendous for us. With considering these parameters, generally we create an instance with a very small amount of memory. When we configure our project, then lots of libraries/packages needed to configure the project. These libraries/packages take a bunch of memories. While there is not enough memories then the error "proc_open(): fork failed-can not allocate memory" arises. Solution:               If we allocate some memory from ssd or hdd that would be used as ram that is needed to install/update some libraries/packages. It may solve the...

Laravel installation on aws ec2 instance ami (amazon machine image) ubuntu 18.04

Image
Introduction:                        Laravel(6.2) is an enriched, well featured, reputed web application framework. If you want to develop a system, you can choose laravel easily because of it's expressive, elegant syntax, secured, emerged platform, template, mvc pattern and much more. There are lot of reasons to choose this web application framework. Tech Details:                       aws ec2, amazon machine image ubuntu 18.04, Nginx(1.14), php(7.3), composer(1.9.0), git(2.17.1), laravel(6.2) Requirement: 1. aws account access 2. running ec2 instance 3. accessing the ec2 instance, if not created to create please visit  blogspot  or  medium 4. nginx installation, if not installed please visit  blogspot  or  medium 5. php installed. if not, to follow the tutorial visit blogspot or medium 6. composer installed. if not, to follow th...

composer installation on aws ec2 instance ami ubuntu 18.04

Image
Introduction:                        Composer is not a package manager like yum/apt, it is a tool for dependency management in php. It allows to declare the libraries that your project depends on and it will manage 'install/update' the libraries for your project. Now you are thinking that it's not dealing with packages? yes it deals with 'packages' and 'libraries' and it manages all packages and libraries per project basis, installing them into a directory  (as for vendor) inside your project. Actually it doesn't install anything globally that's why it is a dependency manager. Tech Details:                       aws ec2, amazon machine image ubuntu 18.04, Nginx(1.14), php(7.3). Requirement: 1. aws account access 2. running ec2 instance 3. accessing the ec2 instance, if can't access please visit  blogspot  or  medium 4. nginx installation, if not...

PHP7.3 installation on aws ec2 instance ami ubuntu 18.04

Image
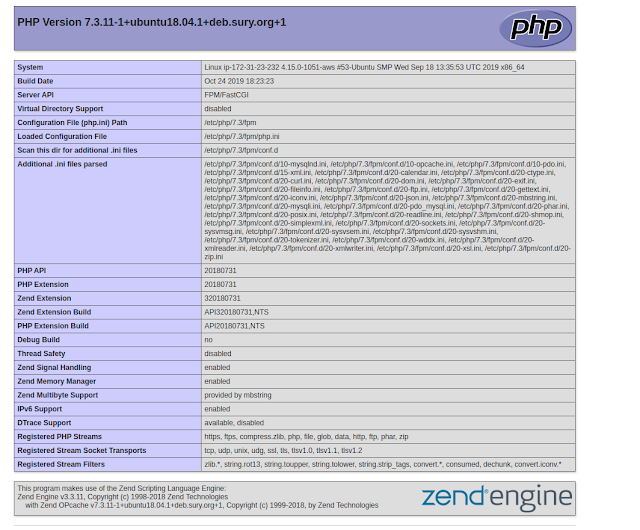
Introduction:                        No need any kind of introduction about php. php7.3 version has been released on 6th December  2018. This is the latest version of php. We will install php7.3 on our ec2 instance whose os is ubuntu 18.04. Requirements: 1. aws account access 2. running ec2 instance 3. accessing the ec2 instance, if can't access please visit  blogspot  or  medium 4. nginx installation, if not installed please visit  blogspot  or  medium Step1: open your terminal and run the command: $ sudo apt update $ sudo apt upgrade Step2: Installation python software properties, software properties common and adding ondrej ppa with required packages. while installing software properties press 'ok' two times and while installing ondrej then click on enter button $ sudo apt install software-properties-common $ sudo apt-add-repository ppa:ondrej/php $ sudo apt update Step3...

nginx installation on aws ec2 instance ami ubuntu 18.04

Image
Introduction:                     Nginx is an open source software for web serving, proxying, caching, media streaming, load balancing and more. This is the fastest web server. Most server administrator like Nginx. We also choose nginx for our web deployment on aws. Requirement: 1. aws account access 2. running ec2 instance 3. accessing the ec2 instance, to create ec2 please visit  https://zrshishir.blogspot.com/2019/10/how-to-create-ec2-instance-on-aws.html or  https://medium.com/@zrshishir/how-to-create-ec2-instance-on-aws-amazon-web-service-ami-ubuntu-18-04-abff3b7fd922 Step1: Installation of nginx using terminal. open up your terminal and execute the following command    $ sudo apt update    $ sudo apt install nginx Step2: Adjusting ubuntu firewall (ufw), if you think it is needed to install then you can work with this step. Firstly you should show the ufw list with the execution foll...

How to create ec2 instance on aws (amazon web service) ami ubuntu 18.04

Image
Introduction:                       Cloud is now a term that is familiar to every server administrator, developer and software engineer. It is a mind blowing concept. If you are a developer, you are busy with your coding. After finishing your project, now it is the most difficult and time consuming part to think about your project deployment. You don't need to get the panic. aws will take all the responsibility of you project's server deployment, security, elasticity, scalability, administration, watching logs, trails and much more. Even-though you can use aws as your working environment i.e os, git, container, editor, ide everything that you needed but the access management and control are your responsibility, aws is not responsible for the access control and management. Requirements:                     1. create an account on aws             ...

Distinction between design principle and design pattern

Difference between Design Principle and Design Pattern In the software engineering, design principle and design pattern are not the same. Design Principle: It provides high level guide lines to design better software applications. Design principles do not provide implementation and not bound to any programming language. E.g. SOLID (SRP, OCP, LSP, ISP, DIP) principles. For example, Single Responsibility Principle (SRP) suggests that a class should have only one and one reason to change. This is high level statement which we can keep in mind while designing or creating classes for our application. SRP does not provide specific implementation steps but it's on you how you implement SRP in your application. Design Pattern: It provides low level solution (implementation) for the commonly occurring object oriented problem. In another word, design pattern suggest specific implementation for the specific object oriented programming problem. For example, if you want create a c...

Laravel Socialite package Implementation

It is used to make a communication with social applications. If you want to authenticate your application without login or registration then you need oauth login or oauth registration. Here, I will use laravel-socialite package to implement oauth. It is described step by step as belows: Step 1: fill your config/services.php file with below credentials, you should take your expected social app's credentials: <?php return [ 'facebook' => [ 'client_id' => env ( 'FACEBOOK_CLIENT_ID' ), 'client_secret' => env ( 'FACEBOOK_CLIENT_SECRET' ), 'redirect' => env ( 'FACEBOOK_REDIRECT' ), ], 'google' => [ 'client_id' => env ( 'GOOGLE_CLIENT_ID' ), 'client_secret' => env ( 'GOOGLE_CLIENT_SECRET' ), 'redirect' => env ( 'GOOGLE_REDIRECT' ), ], 'twitter' => [ 'client_id' => env ( 'TWITTER_C...

how create a new apps for facebook login in a web sites? step by step procedures.

Step1: Go to  developer.facebook.com/apps  Step2: click on 'Create a new app' Step3: Add your domain name Step4: Add your website url Step5: Add Facebook login as product Step6: Add redirect url in facebook login settings, url must be live

How to create github app ( for developers )

Step 1: Login to your github account Step 2: go to  https://github.com/settings/developers Step 3: click on the 'New Oauth App' button at the right conrner Step 4: fill the fields very carefully and click the Register application button   Done..............Take all credentials (client is, secret key ) for using in your application Thanks

Background Image with css in Laravel

Image
Error:  Failed to load resource: the server responded with a status of 404 (Not Found) I face the same problem and solved it just now. My css code was background: url(images/banner.jpg); and the error was Failed to load resource: the server responded with a status of 404 (Not Found) . The solution is adding two dot '.' and a single slash '/' before images background: url(../images/banner.jpg);  Now the image has been appeared. My images and css folder in my project public folder and banner.jpg is in the images folder.

"[PDOException] SQLSTATE[HY000] [2002] No such file or directory" when you migrate your database with mysql server in laravel

This problem occurs when you have installed your laravel project perfectly and wanted to migrate or execute the command 'php artisan migrate', then your terminal is showing this problem. There so many solutions on the web I tried and the only solutions are given below: Step 1: go to config/database.php file and open it and change just mysql array as below-                           'mysql' => [                                                'driver'    => 'mysql',                                                'host'      => '127.0.0.1',                                ...